Uncategorized - Page 2 of 4 - Photoshots - the web folio of Tony Stewart.

Archive for the ‘Uncategorized’ is_category>

Aurora Australis 5

Thursday, May 16th, 2024
Credit here must go to Photo Pils for the bones of this post.

Essential Gear Checklist & Tips for Aurora Photography

Here’s a checklist of the equipment you’ll need for successful aurora photography:

  1. Camera. A DSLR or mirrorless camera capable of shooting in Manual mode (M), allowing you to adjust settings like ISO, aperture, and shutter speed.
  2. Wide angle lens. A fast, wide-angle lens (f/2.8 or wider) to capture expansive landscapes and let in enough light for the aurora.
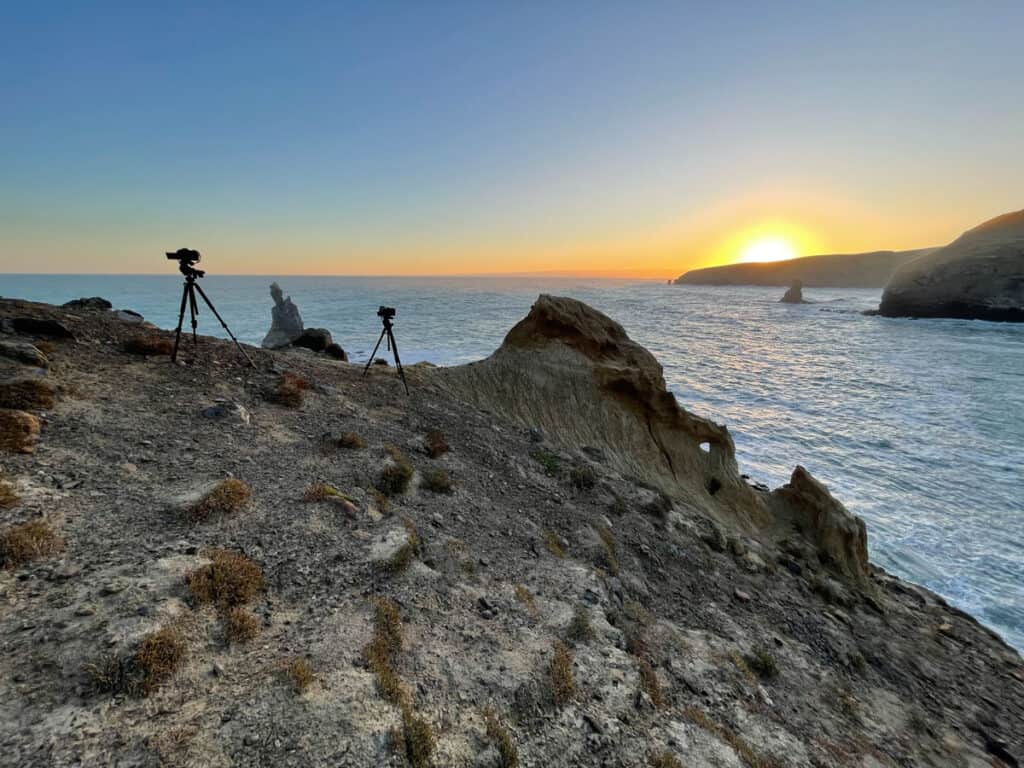
  3. Tripod. A sturdy tripod, preventing any blur from hand movement or wind. Maybe a weight. Sometimes I take an empty carry bag that I fill with stones on site. I hang this on a tripod lever.
  4. Extra batteries. Cold weather drains batteries quickly, so bring extras and keep them warm in your pockets.
  5. Memory cards. High-capacity memory cards to store all your high-resolution images without running out of space.
  6. Some way to minimise moving your camera when pressing the shutter. Either an intervalometer / camera remote / touch screen or self timer to minimize camera shake when taking photos.
  7. Headlamp. Ideally with a red light. Or alternatively hoose one that has a dimmer function, so you can lower the brightness of it. Too bright and your eyes have a hard time adjusting back and forth from the bright light to the dark night. You’ll need your night vision for shooting.
  8. Lens cleaning cloth. To keep your lens free from moisture and fogging.
  9. Warm clothing and accessories. Multiple layers, gloves, hats, and boots to keep you warm during long nights outside. Maybe even a thermos of warm coffee and a seat!


Choosing the Best Camera for Aurora Photography

Choosing the right camera for photographing the northern lights involves understanding which features are most important for capturing this unique natural phenomenon.

Here are the key features to look for in a camera for northern lights photography:

1. Low-light performance. The camera should excel in low-light conditions, allowing you to capture the aurora borealis with minimal noise. Cameras with larger sensors, such as full-frame models, typically perform better in these conditions.

2. High ISO capability. A camera with a high ISO range offers more flexibility in adjusting sensitivity to light, enabling you to shoot in very dark environments without compromising image quality.

3. Manual mode (M). The ability to manually adjust settings like shutter speed, aperture, and ISO is crucial for aurora photography, giving you complete control over how the camera captures the light show.

4. Long exposure support. Since capturing the northern lights often requires long exposure times to gather enough light, your camera should be capable of exposures of several seconds to several minutes.

5. Durability and weather sealing. Given the cold and potentially wet conditions in which you’ll be shooting, a camera that’s weather-sealed and built to withstand the elements is essential.

6. Battery life. Cold weather can drain batteries quickly, so a camera with good battery life – or the option to use an external battery pack — is important for long shooting sessions.

7. Raw format. While this might sound obvious, it’s always good to remember it. Shooting in RAW format allows you to capture all the data from your sensor, giving you more flexibility in post-processing to bring out the best in your aurora images.


Click here to go back to the main blog page for other articles


Cheat Sheet of Best Settings for Southern Lights Photography

The aurora can vary in intensity, movement, and color, so having a starting point can be incredibly helpful.

Here’s a cheat sheet that you can adjust based on specific conditions:

1. Image format: RAW. This format captures more detail and allows you more flexibility in post-processing.

Using Manual mode (M) on your camera is crucial for northern lights photography due to the unique and variable lighting conditions you’ll encounter.

Here’s why you should use Manual mode (M) for your aurora photography:

  • Complete control. Manual mode (M) hands you full control over aperture, shutter speed, and ISO. The aurora’s brightness can fluctuate rapidly, and Manual mode allows you to respond to these changes immediately without relying on your camera’s guesswork.
  • Consistency. It helps maintain consistency across your shots. Automatic modes might produce varying exposures due to the camera’s metering getting confused by the dark sky and bright aurora. Manual settings ensure that once you find the perfect exposure, it stays consistent across your shots.
  • Creative freedom. You can decide the visual outcome of your shot. Whether you’re aiming for a perfectly exposed aurora against a dark sky or wanting to capture the landscape’s silhouette against the aurora, Manual mode (M) allows you to make these creative decisions.

By controlling every aspect of the lightness, you can adapt to the aurora’s variability and express your creative vision.

Choosing the RAW image format for souhern lights photography is a strategic decision that significantly impacts the post-processing flexibility and overall quality of your final images:

  • Unlike JPEG or other compressed formats, RAW files capture all the data from the camera’s sensor without any in-camera processing or compression.
  • The dynamic range in a RAW file is significantly higher than in a JPEG file, meaning it can store more information about shadows and highlights. This is crucial when photographing the northern lights, as you can recover more detail from dark foregrounds and bright auroral displays during post-processing.
  • You can adjust the white balance post-shooting to accurately represent the colors you saw, or creatively enhance them for artistic effect.

This choice is particularly advantageous for the challenging lighting conditions and dynamic range found in aurora borealis scenes.

2. Stabilization: Off. Turn off any image stabilization when using a tripod to avoid unintended blurring.

Image stabilization, whether optical (OIS) or sensor-shift (IBIS), is designed to compensate for camera shake, making it invaluable for handheld shooting. However, when your camera is securely mounted on a tripod, keeping stabilization activated can inadvertently introduce blur.

That’s why turning off any form of image stabilization (IS) when your camera is mounted on a tripod is a nuanced yet essential practice in aurora photography.

3. Camera mode: Manual (M). This gives you complete control over all settings.

4. Aperture: f/2.8 to f/4. Use the widest aperture (lowest f-number) your lens allows to capture as much light as possible.

When it comes to photographing the northern lights, your primary objective is to capture as much of the elusive aurora glow as possible. Achieving this begins with one critical camera setting – your aperture. The aperture controls the amount of light that reaches your camera’s sensor, and in the dim conditions of night sky photography, every photon counts. To maximize light intake, set your lens to its widest aperture. Fast lenses, those with maximum apertures of f/2.8 or wider, are ideal for aurora photography.

However, wide apertures come with a shallow depth of field, which can leave elements of your foreground out of focus if they’re too close to the lens. In such cases, consider employing techniques like focus stacking, where you combine in post-processing multiple images at different focus points to achieve a uniformly sharp scene from foreground to stars.

If your lens doesn’t open up to f/2.8 or wider, don’t worry. Open it to the widest aperture available, and adjust your ISO and shutter speed accordingly to compensate for the reduced light intake.

Remember, the goal is to let in as much light as possible without compromising the quality of your image with excessive noise.

5. Focus: Manual, set to the hyperfocal.

Autofocus can struggle in the dark. You can focus on an area pre-darkness if you arrive early. Otherwise if in darkness, focus manually on a distant light in the distance. Otherwise you can try hyperfocal focusing.

Watch a video that will help you focus to the hyperfocal distance in the dark. You can calculate the hyperfocal distance very easily with the PhotoPills depth of field calculator.

Note: If the main subject is at a greater distance than the hyperfocal distance, you should focus directly on the subject. You will lose some depth of field in the foreground but everything that is at infinity will remain focused and the subject will be tack sharp.

The other key means to focus if set up in the dark is to use your camera’s live view feature if it has it, to focus manually.

  1. Aim at a bright star or distant light.
  2. Zoom in using the live view’s digital zoom feature.
  3. Adjust the focus until the star or light is as small and sharp as possible.

One of the problems we face at night photographing the aurora, is we are shooting with maximum aperture. By default this does restrict our depth of field, so can ge a bit tricky. If you have interesting foreground elements you wish to include and they are not at infinity, consider using a technique called focus stacking. Take multiple images with different focus points—from the foreground to the aurora—and blend them in post-processing to achieve an image that’s sharp throughout. Sometimes you may wish to take a photo with any foreground subject focused, to allow choice stacking your focus later in post production.

6. Shutter speed: 

You need to be careful with your shutter. Both to gain a good exposure, but to minimise star blur, and to preserve any aurora pillars. In essence you need to keep the shutter speed as short as feasible. Shorten for more intense auroras or to capture finer details and lengthen for fainter auroras. The reality is your shutter will still be long in everyday terms – between 5-30sec.

  • Faint and static aurora. For auroras that are barely visible and relatively stationary, a longer exposure, closer to the 25-30 second mark, can help gather enough light to make these subtle displays visible in your photos.
  • Vibrant auroras. When the aurora is clearly visible and showing moderate movement, aim for a shutter speed between 8 and 15 seconds. This range strikes a balance between capturing the movement of the aurora and keeping the stars as sharp points of light.
  • Intensely active aurora. For those moments when the aurora is dancing rapidly across the sky, a fast shutter speed of 1-10 seconds is key. This setting helps freeze the motion of the aurora, capturing the intricate details and preventing the lights from blending into a shapeless glow.

To ensure you don’t blur star trails, you can use either :

– the 500 rule to work out what shutter speed. The 500 rule works by dividing 500 by your focal length (ie 15mm lens), so 500/15 = 33.33. This means when using a 15mm lens on a full-frame camera, you can use a shutter speed of 33 seconds before getting blurry stars.

or

– You can use the PhotoPills Spot Stars pill to avoid star trailing. For calculating the necessary exposure time, use the PhotoPills Spot Stars calculator by following these steps:

  • Open the PhotoPills app and navigate to the Spot Stars calculator.
  • Enter your camera model, the lens focal length, the aperture setting, the minimum declination of the stars you’re capturing, and select the accuracy mode (with the default usually being sufficient).

If you’re unsure of the stars’ minimum declination, use the AR feature in PhotoPills. Point your phone in the direction you’re planning to shoot, and let the app calculate the exposure time for you. If in doubt, you can default the declination to 0º. PhotoPills > Spot Stars > AR. Tap the AR button, point your smartphone where you’re framing the camera and read the maximum exposure time you need to use.

7. ISO: 1600 to 8000. Start with ISO 2000-3200 as a baseline. Increase for weaker auroras or decrease for stronger ones. Here’s a detailed look at how to effectively use this ISO range:

1. Enhanced lightness. A high ISO allows a good lightness from a small exposure, which is crucial in dark environments where the aurora is visible. This allows you to capture the faint colors and details of the aurora that might not be visible at lower ISOs.

2. Faster shutter speeds. Using a higher ISO you can set faster shutter speeds. This is beneficial for capturing the dynamic, fast-moving shapes of the aurora with less blur, preserving the details and structures of the lights.

3. Compensate for dim conditions. In situations where the aurora is faint or you’re shooting in particularly dark locations without much ambient light, raising the ISO helps you achieve a balanced lightness without overly a long exposure that can lead to motion blur from the moving lights.

Before your aurora shooting session, test your camera’s performance at ISO 3200 to 8000 in low light conditions to understand its limitations and optimal settings.

While starting in the 3200 to 8000 range is a good baseline, constantly monitor your results and adjust as necessary:

  • If the aurora becomes brighter, you might lower the ISO to reduce noise.
  • Conversely, if the aurora is faint or you’re aiming to freeze its motion more sharply, you may need to push the ISO higher.

The optimal ISO setting also depends on your camera’s capabilities:

  • High-end cameras. Advanced models, especially those with full-frame sensors, can handle higher ISO settings (6400 to 12800) with less noise, allowing for clearer, more detailed shots even in low light.
  • Low-end cameras. Cameras with crop sensors or lower light sensitivity may produce noticeable noise at higher ISO levels. For these cameras, keeping the ISO at 6400 or below is advisable to maintain image quality.

Additionally, environmental factors will affect your ISO setting:

  • Moonlight. A bright Moon can illuminate the landscape, enabling you to lower your ISO and still capture well-exposed images.
  • Artificial light. In areas with street or house lights, a lower ISO can help avoid overexposure and maintain the natural colors of the aurora. Though potentially leading to colour casts.

The goal is to capture as much detail and color in-camera by choosing the most suitable ISO for the scene before you. Remember that higher ISOs come with the trade-off of increased noise or grain in your images. Cameras with larger sensors (like full frame sensors) generally handle high ISO noise better than those with smaller sensors.Butv these days software like Topaz DeNoise / AI goes a long way to help in post production.

8. White Balance: Daylight or 4100-4300K. Dont use auto! I often use Daylight and adjust the colour temperature in post production. But Fluorescent (around 4100-4300K) can help maintain the natural colors of the aurora.

9. Shutter delay: 2s (optional). You’ll avoid any possible vibrations when you press the shutter button. This is only necessary if you won’t be using an intervalometer.

For very clear photos, make sure your camera is on a firm tripod. Use a 2-second timer to stop blur when you click the button. If it’s windy, use a 5-second timer instead to keep the camera still when you press the button.

You can also use an intervalometer. But when taking pictures of the northern lights and moving around to follow them, it’s easier to just use the camera’s timer.

10. Keep your batteries warm

Remember, the goal is to maximize your time under the aurora borealis.

Unfortunately, the cold, enchanting nights under the aurora can be harsh on your camera’s batteries…

Cold temperatures reduce battery life, often at the most unexpected moments during your shoot. To prevent this, an essential strategy is to keep your batteries warm, ensuring they retain their charge for as long as possible.

Always carry spare batteries and store them in a place where they can benefit from your body heat. A practical method is to keep them in a zip-lock bag tucked inside an inner pocket of your jacket, close to your body. This warmth can significantly slow down the rate at which your batteries deplete.

11. Fight condensation

One of the trickier aspects of southern lights photography is managing the transition between the biting cold outdoors and the warm indoors without causing condensation on your camera. This phenomenon not only obscures your lens but can also seep into your camera and lens, potentially damaging the internal mechanisms over time.

The key to preventing this is to control the temperature change your equipment experiences. Looking at weather reports especially establishing fog / dew point can help. You may need a special astro dew heater (this is a heated neoprene strap that wraps around your front lens element, and runs off a portable battery).

Click here to go back to the main blog page for other articles


How to Photograph the Southern Lights with your iPhone

You’re probably wondering if you can take aurora photos with your iPhone. Well, the short answer is… yes!

However, in order to shoot the southern lights you would need any iPhone model starting with iPhone 11. That’s because Night mode is only available on iPhone 11 and above models.

In low-light conditions Night Mode will automatically turn on. The Night Mode icon will appear in the top left corner of your phone. This feature keeps the camera sensor open for a longer amount of time in order to get more light in, and therefore capture more detail in the image.Oh. It’s super easy.

  1. Open the camera app on your iPhone.
  2. Your iPhones will automatically switch to Night Mode when it detects low light in the scene. If it doesn’t, set the camera app to Night Mode.
  3. By default, depending on how dark the environment is, the exposure in iPhone’s Night Mode is somewhere between 1 and 3 seconds. If you need more than that you can change the exposure time to the maximum possible.
  4. There’s a hidden settings menu in the iPhone’s camera app. Open this menu using the top arrow.
  5. Look for the Night mode icon and tap on it.
  6. A slider will appear that allows you to adjust the exposure time.
  7. Slide it all the way to the right at Max.
  8. Point the phone where you want to take your aurora photo.
  9. Hold the phone with both hands and tap the shutter button.
  10. Stand still until the iPhone has finished capturing the photo.


Click here to go back to the main blog page for other articles


Creating Aurora Panoramas

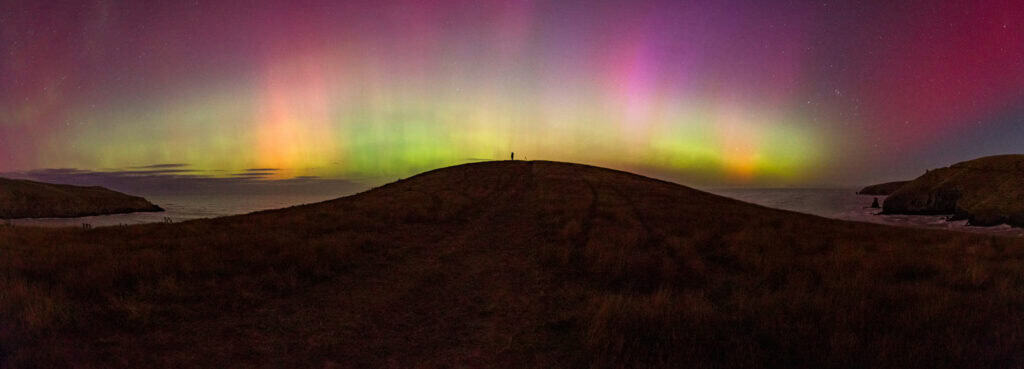
Creating a panoramic image of the southern lights involves stitching together multiple photographs to form a single, wide-view picture. This technique allows you to capture the vastness of the aurora australis and the surrounding landscape in great detail.

Here’s a step-by-step guide to creating a panoramic image of the Aurora

1. Equipment that you need
  • Camera: Any camera that allows manual control of settings.
  • Lens: A wide-angle lens is preferred for its broader field of view.
  • Tripod: Essential for keeping your camera stable and aligned during the shoot.
  • Panoramic head (optional): For precise alignment and rotation. Though not mandatory, it helps in matching the nodal point of the lens, reducing parallax errors.
2. Camera settings
  • Set your camera to Manual mode (M) to have a consistent lightness across all shots.
  • Set your lens to manual focus and adjust it to infinity or to the hyperfocal distance to ensure the stars and aurora are sharp.
  • ISO, aperture, and shutter speed should be set according to the intensity of the aurora and the desired lightness
3. Composition and framing
  • Plan your panorama: Visualize or sketch the entire scene you intend to capture, identifying key elements you want to include.
  • Start from one end of the scene and decide on the overlap between images. A 30-50% overlap between consecutive shots is ideal for effective stitching.
4. Shooting the panorama
  • Shoot in a consistent direction. Choose either left-to-right or right-to-left and stick with it.
  • Keep the camera level to avoid uneven horizons. A tripod with a built-in level or a hot shoe bubble level can assist with this.
  • Take multiple series if you’re unsure about the overlap or lightness. It’s better to have more images than you need than to miss a part of the panorama.
5. Post-processing
  • Import your images into a photo editing software that supports panorama stitching (LightroomPhotoshop, or a dedicated panorama software like PTGui).
  • Select the images for your panorama and use the software’s “Merge/stitch to Panorama” function. Adjust settings according to the software’s options to blend the images seamlessly.
  • Fine-tune the panorama: Adjust exposure, color balance, and crop the image as needed to create a cohesive final image.
Additional tips
  • Practice shooting panoramas during the day to get comfortable with the process and your equipment.
  • Consider the movement of the aurora. Fast-moving auroras may require quicker shooting between frames to maintain continuity in the panorama.
  • Experiment with vertical panoramas (portrait orientation) for a different perspective, especially when the aurora is directly overhead.

Credit https://www.photopills.com/articles/northern-lights-photography-guide


Click here to go back to the main blog page for other articles

Posted in Uncategorized

Aurora Australis 4

Thursday, May 16th, 2024

Credit here must go to Photo Pils for the bones of this post.

Essential Steps for Planning Your Auroral Photo Shoot

To see the Southern lights you have to plan carefully. This includes choosing the right time, place, and weather.

You need four main things in essence. All four really to be in your favour, but none are guaranteed!!

1- To be in a place that’s able to see the auroral oval. Not just the physical location, but how that location fits in with the strength of aurora that you might expect there. To know that, you will need some understanding what phase of the solar cycle we are in, and if this is the best time of year (ie if you have maximum darkness, +/or and seasonal bias).

2- To be really dark

3- The sky must be clear, so you’ll need to keep a close eye on the weather forecast.

4- The moon is not too bright


**************************

There are some great apps for planning Aurora photos. The two main aurora ones would be Glendale and Space Weather Live.

Glendale has more data, so can be a bit tricker knowing how to read it if you are learning.

https://aurora-alerts.uk/

Space Weather Live  uses a very simple color code:

  • Green: Low aurora activity.
  • Yellow: Medium aurora activity.
  • Red: The redder the plots get, the better is for aurora activity!
Great for generally planning sun / moon / star alignment is PhotoPills . Especially the augmented reality seeing where the sun / moon will be while viewing your scene live, scrolling through various time variations.
**************************

There are a few web links that I’ll often use too at different times:


There are also several Facebook pages dedicated to sharing photos and receiving alerts.

https://www.facebook.com/groups/NZaurora

https://www.facebook.com/groups/SouthernHemisphereAuroraGroup

https://www.facebook.com/groups/shagupyaarse

(despite the name, this is legit!!)


Click here to go back to the main blog page for other articles


**************************

Using Space Weather Live to find out the Aurora Forecast

How do you actually know when you’re going to get an Aurora and of how to read the different indicators?

Open the app up.

The first thing you see on the homepage is the Kp index, which is basically a measure of

  • The size of the auroral oval.
  • The strength of the solar storm.

It’s a 3-hour average and it’s a global average. So Kp is an interesting indicator, because it’s just an average of whats happened.

So it’s a very basic indicator. It doesn’t tell you about little sub storms that happen which could be stronger.

The home screen shows you the current Kp index

Space Weather Live – The home screen shows you the current Kp index.

Space Weather Live long term Kp forecast screen
Space Weather Live > More data > Aurora Forecast. Tap the More data button. Then tap Aurora forecast, and scroll down to check the long term Kp forecast.

For here, you should have a look at a long term forecast. And that one will show you kind of maybe what’s expected over the next month.

To check it, tap More data > Aurora forecast.

Then, scroll down to the Long term Kp forecast chart.

However, take it with a grain of salt, because what the experts are basing that on is if you have an area of really high activity, like a coronal hole.

Coronal holes are the source of high speed solar wind streams. When these high speed streams arrive at Earth, they can produce active auroras.

The interesting thing is that a coronal hole can make more than one rotation. So as the sun rotates, you might see that again and again.

Now, go back to the homepage.

There, again, you can see the short term expected forecast for the next 3 days.

The app gives you a projected Kp forecast for a minimum and a maximum. And it also breaks it down into higher latitudes and mid latitudes.

real time solar wind speed and density charts
Space Weather Live – Scroll down the home screen to see the real time solar wind speed and density.


And while the Kp index gives you a quick indication of the strongest observed geomagnetic activity over a 3-hour period, the real time solar wind indicators is the really helpful bit.

Real time solar wind speed

The origin of Southern lights is basically gusts of solar wind.

Therefore, the solar wind is the first piece of the puzzle that you need to know about to predict whether there will be aurora activity or not at a certain date and time of the day.

In this sense, Space Weather Live has a solar wind chart indicating the speed. The higher the speed, the higher chances of having aurora activity. The target is a speed 400 km/sec+, 500+ even better.

But to make things easier, you don’t need to remember any numbers or ranges. Just look at the color!

Quick recap of Space Weather Live’s color code:

  • Green: Low aurora activity.
  • Yellow: Medium aurora activity.
  • Red: The redder the plots get, the better is for aurora activity!


Real time solar wind density

The second piece of the puzzle you need to know about is the density of the solar wind.

The density of the solar wind is basically the number of solar wind particles per square centimeter.

But in terms of aurora activity, which is what matters to you, the higher the solar wind density, the higher the aurora activity. The target is a density 10 p/cm3 +.

Again, when looking at the Space Weather app, look at the color code 😉


real time charts of the interplanetary magnetic field variables

Space Weather Live – Keep scrolling down the home screen to see the interplanetary magnetic field variables.

Real time interplanetary magnetic field – Bt & Bz

The third & fourth piece of the puzzle you need to know about is the magnetic field of the Sun, also called interplanetary magnetic field (IMF).

OK, here’s a simple explanation. Charged particles can hold both an electric current and create a magnetic field. So as you can imagine, the charged particles given off by the Sun also hold a magnetic field. The particles stretch the magnetic field of the Sun around the planets. And this is what astronomers call the interplanetary magnetic field (IMF). The IMF value is a combined measure of the magnetic field strength in the north-south, east-west, and towards-Sun vs. away-from-Sun directions.

The see the best possible auroras you want that:

  • The total strength of the interplanetary magnetic field (indicated with Bt) to be as high as possible (10+) and,
  • The Z-component (Bz) of the interplanetary magnetic field towards the south. The stronger the negative value nT value to the south, the better. If it doesnt indicate south, I probably wouldn’t bother even going out myself if indicating north.

In other words

  • Look for a high as possible Bt number.
  • The longer the Bz stays south, the better.

These are 2 key indicators for me, as to whether or not I should go out and shoot.


real time auroral oval position and size over a map of the poles
Then check the auroral oval position and size

Don’t forget that the auroral oval is not a concentric circle – it’s pulled and twisted by our magnetic field lines.
So it actually moves around the Poles throughout time. And its size changes as well.

At Space Weather Live, you can have a look at NOAA ‘s auroral oval model. It gives you a short-term forecast of the intensity of the auroral oval for both the northern and the southern hemisphere.

So if a solar storm grows in intensity, that oval will actually get bigger and bigger.

From there you can set an alert on My Aurora Forecast

My Aurora Forecast home screen

My Aurora Forecast – Tap the settings icon (gear) to adjust the notifications.
My Aurora Forecast settings screen
My Aurora Forecast > Settings. Set the notifications according to your preferences.
Then, select one of the models to access the forecast charts for temperature, humidity, and most importantly, precipitation and clouds.


In addition, I would also take note of the Hemispheric power, measured in GW. Again, this tends to be colour coded as a guide for how serious things will get!

Aurora App GW


Another worthwhile check at this stage, would also be on a local K index. Essentially to see if there may be an imminent upswing of magnetometer activity known informally as the ‘Cloake Effect’.

It has been observed quite frequently, that as magnetic levels start to turn upwards after a sudden dip, that visible auroral activity noticably increases also. Again one of those things that is not fully understood, but first observed by Timaru photographer Geoff Cloake, and subsequently supported by the amateur observer community.

https://www.swpc.noaa.gov/products/goes-magnetometer

Cloake Effect outlined in a graphic

************************************


Another really confusing thing to get your head around, is the time used in many forecasts.

Usually these are given in UTC, which NZ is 12 hrs ahead normally, +13hrs during daylight saving.

UTC conversion

*************************************************

In summary, here are the weather and aural forecast key indicators to bear in mind:

    • Number of night hours. To capture auroras, you need a dark sky. This indicator tells you how long you can be shooting.
    • Moon phase. The less light in the scene, the brighter you’ll see the northern lights. So shoot on a night around New Moon. If you want some Moonlight to illuminate the scene and your foreground, try to shoot with some Moon or even a Full Moon.
    • Kp index. The higher the Kp index, the stronger the geomagnetic event (that is, the probability of having auroras). As noted previously, an adequate ‘broad’ tool.
    • Solar wind speed. The start of more in depth analysis of data. Again, the higher the solar wind density, the higher the aurora activity. Aim 400+
    • Solar wind density. Same thing here. The higher the solar wind density, the higher the aurora activity. Aim 10+
    • Interplanetary magnetic field (Bt and Bz). You need both of these to be true:
      • The total strength of the interplanetary magnetic field (indicated with Bt) to be as high as possible. Look for a high as possible Bt number.
      • The Z-component (Bz) of the interplanetary magnetic field towards the south. The longer the Bz stays south, the better.
    • Auroral oval. The bigger and brighter, the better.
    • Weather forecast (precipitation and clouds). You need clear skies!
    • Hemispheric Power
    • Cloake Effect
    • Time Difference / Forecast conversion

Click here to go back to the main blog page for other articles

Posted in Uncategorized

Aurora Australis 3

Thursday, May 16th, 2024

Credit here must go to Photo Pils for the bones of this post.

7 Key Factors Determining if You Can See the Southern Lights

Actually, the Southern lights actually occur all year long, and all day long. Yet we can only get to experience them when certain conditions all come together. These things are:

  • The time of the day. It must be dark!
  • Your location. Both in terms of actual latitude, as well as a location free from light pollution.
  • The time of the year.
  • The moon phase.
  • Terrestrial (earth / land) weather.
  • The solar weather / activity.
  • Solar Cycle

1) Time of Day

Let’s break these down. You can see auroras at any time of the day as long as it is dark, there are clear skies, and solar activity.

However,

  • The strongest lights tend to appear between 21:00 and 2:00, though the best sightings often occur between 23:00 and midnight. That’s because, even after the sun goes down, there’s still a little bit of light left in the sky for a while.
  • Between 04:00 and 17:00 there is generally too much daylight to see the aurora.
  • Exceptions are the darkest months of the year and higher latitudes, where it is dark 24/7. In the Southern hemisphere this tends to be from mid-May to the end of July.

2) Location

In the northern hemisphere, the aurora is often more pronounced because you can access land mass within the aurora oval (between 60º and 75º S)

To photograph auroras in the southern hemisphere, we have a lot of ocean at this latitudes so are forced to settle with a vantage point closer to the equator than places like Norway, Iceland, & Canada provide. So unless you get to go to Antarctica, you’ll need to go beyond the aurora oval.

In addition to this, you need to find a location with little or no pollution at all.

  • In the middle latitudes (above 67ºS), such as the south of Western Australia, Tasmania and New Zealand, the direction to point your camera to is paramount. Look for unobstructed views facing south.
  • Closer to the pole (between 67ºS and 90ºS), in Antarctica, the aurora can happen pretty much anywhere in the sky. Contrary to the northern hemisphere, the lights often start to show up from west to east. But as the night goes on, they can occur in any direction.
diagram of the aurora oval in the northern and southern hemispheres

Illustration by William Copeland. What are the northern lights? Sept. 2020.
URL: 
https://nordnorge.com/en/artikkel/what-are-the-northern-lights/.

Viewing the aurora in NZ daigram

Courtesy : Craig Crew, Aurora Australis FB page

3) Time of Year

Regardless of the hemisphere you plan to travel to, spring and autumn generally provide more stable weather conditions and milder temperatures plus there is greater aurora activity around the equinoxes.

During equinoxes, Earth’s magnetic poles (north and south) are at right angles to the flowing solar wind, two times a day. During these times, the solar wind is effectively stronger, enhancing magnetic storms. As the seasons change, the poles either point more toward or away from the Sun reducing this effect.

That is…

  • The second and third week of March.
  • The last two weeks of September.
Southern hemisphere
table showing the aurora visibility in the southern hemisphere month by month

To see the aurora australis the best time is during the autumn and winter, from March to September. That’s when the nights are really long and super dark. During these months, the nights are really long and dark, which makes it easier to see the beautiful lights dancing in the sky. Even though these lights are always there, you can’t see them in the summer months like Nov, Dec, Jan, Feb because the sun is too bright and hides them.

4) Moon Phase

Scientifically speaking, the moon doesn’t make the northern lights stronger or weaker. In other words, you can actually photograph auroras in any moon phase.

Having said that, the moon can affect how much light there’s in the scene and, thus, how you see (and your camera captures) the aurora in the sky, the stars and the foreground:


Around New Moon or with no Moon at all (after Moonset)

When there’s a New Moon or no moon at all (you’re shooting after Moonset) it’s really dark.

In these conditions, a strong solar activity will create bright northern lights. On the other hand, a faint aurora may be difficult to see even if there is no moon visible.

When the scene is really dark your foreground will be quite dark too. So take this into account when creating your composition.

With Moon (phase less than 50%)

A bright moon may wash away the details of a faint aurora and stars, but you can still see the aurora easily.

Since the Aurora is dependent on solar activity and shifting weather patterns, a moon with a phase less than 50% has no effect on the intensity or color of the northern lights.

Depending on the Moonlight conditions, you may have enough light to capture detail in the foreground.

Around Full Moon

When the moon is full and bright, it’s like having a big flashlight in the sky, which can make the northern lights look less bright.

But seeing the big, bright moon and the northern lights together can be really cool, like a special light show. The contrast is not as great but it tends to make the sky appear a dark indigo blue.

If you’re taking pictures, the moon an help by lighting up things on the foreground, making your photos look nicer because you can include part of the landscape in your composition.


5) Terrestrial (earth / land) Weather

It’s important that the sky is clear and doesn’t have clouds covering it up!

How can you check weather

You can download the Windy application on your smartphone and tablet. You can also go to the website on your laptop and desktop computer.

Windy is available on iOS and Android.


6) Solar Weather

Usually there needs to some elevated space weather by way of CME, flare or coronal hole.

What solar activity is best for southern lights?

northern lights kp index chart

The brightness of the aurora is determined by the amount of solar activity in the location.

The solar activity is measured with the Kp index, the solar wind speed and intensity, and the interplanetary magnetic field strength and direction.

Even though I have posted about the limitations of Kp (being past activity and driven by Northern hemisphere magnometers), it does give us a starting point. For now, let’s use the Kp index.

The Kp index is based on how the solar wind and Earth’s magnetic field are interacting at the moment.

It helps you guess where and how well you’ll see the northern lights. In other words, it’s like a weather forecast but for the northern / southern lights.

It measures how much the solar wind is shaking Earth’s magnetic field, on a scale from 0 to 9. A low number means not much is happening, but a high number means a big light show might be coming.

  • 0 to 4: The northern lights might be quiet and faint, mostly green, and you might need a camera to really see them well.
  • 5 to 6: Things get exciting! The lights move more and might show off colors like yellow, pink, or even purple. If you’re lucky, you might see a special kind of northern light called a corona, where the lights swirl directly overhead.
  • 7 to 9: This is when the northern lights go all out. They can fill the sky, show rare colors like red, and be seen much further south than usual.

In places like Alaska, Canada or Iceland, a Kp 3 means a good chance of seeing the lights. But to see them in places further south, like NZ, you’d need a Kp 5 or more.

A Kp 5 or more means a solar storm of grade G1 is happening. The higher the Kp number, the stronger the storm. A Kp 9 is a very big deal and means the maximum possible storm (grade G5) is happening.

Nevertheless, the Kp-index gives you an idea of what the auroras might do, but it’s not perfect. It’s always a bit of a guess, so it’s good to check the forecast and hope for clear skies.

We will look into this some next post, with further detail just how you can gauge all this.

7) Solar Cycle

The solar cycle, also known as the solar magnetic activity cycle, sunspot cycle, or Schwabe cycle, is a nearly periodic 11-year change in the Sun‘s activity measured in terms of variations in the number of observed sunspots on the Sun’s surface. Over the period of a solar cycle, levels of solar radiation and ejection of solar material, the number and size of sunspotssolar flares, and coronal loops all exhibit a synchronized fluctuation from a period of minimum activity to a period of a maximum activity back to a period of minimum activity.

The magnetic field of the Sun flips during each solar cycle, with the flip occurring when the solar cycle is near its maximum. After two solar cycles, the Sun’s magnetic field returns to its original state, completing what is known as a Hale cycle.

This cycle has been observed for centuries by changes in the Sun’s appearance and by terrestrial phenomena such as aurora but was not clearly identified until 1843. Solar activity, driven by both the solar cycle and transient aperiodic processes, governs the environment of interplanetary space by creating space weather and impacting space- and ground-based technologies as well as the Earth’s atmosphere and also possibly climate fluctuations on scales of centuries and longer.

We are currently in cycle 25, which started Dec 2019.


Solar cycle graph


Types of Auroral Observations

Ian Cooper on the Aurora Australis NZ Facebook page has put together a ready guide, to the type of aurora that he has seen over many years of observing such phenomena. I have adapted that here.
Types of Aurora

Credit : Ian Cooper, Astronomer, Aurora Australis NZ Facebook page.


Airglow

On the back of all this, it is probably worth a quick mention about a non Auroral phenomenon, called airglow. Whereas an aurora is driven by high-energy particles originating from the solar wind, airglow is energized by ordinary, day-to-day solar radiation. Airglow is faint luminescence of earth’s upper atmosphere that is caused by air molecules’ and atoms’ selective absorption of solar ulttraviolet and X-radiation. Unlike auroras, which are episodic and fleeting, airglow constantly shines throughout Earth’s atmosphere, and the result is a tenuous bubble of light that closely encases our entire planet. (Auroras, on the other hand, are usually constrained to Earth’s poles.) Just a tenth as bright as all the stars in the night sky, airglow is far more subdued than auroras, too dim to observe easily except in orbit or on the ground with clear, dark skies or a sensitive camera. But it’s a marker nevertheless of the dynamic region where Earth meets space.

Most of the airglow emanates from the region about 50 to 300 km (31 to 180 miles) above the surface of Earth, with the brightest area concentrated at altitudes around 97 km (60 miles). Unlike aurora, airglow does not exhibit structures such as arcs and is emitted from the entire sky at all latitudes at all times. The nocturnal phenomenon is called nightglow. Dayglow and twilight glow are related terms. Nightglow is very feeble in the visible region of the spectrum; the illumination it gives to a horizontal surface at the ground is only about the same as that from a candle at a height of 91 metres (300 feet). It is possibly about 1,000 times stronger in the infrared region.

This photochemical luminescence (which is also called chemiluminescence) is caused by the chemical reactions of incoming solar radiation with atoms and molecules present in the upper atmosphere. Sunlight supplies the energy needed to raise these materials to excited states, and they in turn produce emissions at particular wavelengths. Atmospheric scientists frequently observe emissions from Sodium (Na), hydroxyl radical (OH), molecular oxygen (O2), and atomic oxygen (O). Emissions of sodium occur in the sodium layer (some 50 to 65 km [31 to 40 miles] above Earth’s surface), whereas emissions from OH, molecular oxygen, and atomic oxygen are most concentrated at altitudes of 87 km, 95 km, and 90–100 km, respectively.

The Milky Way and airglow seen in the Dark Sky Alqueva Reserve in Portugal.
The Milky Way and airglow seen in the Dark Sky Alqueva Reserve in Portugal. Credit : Miguel Claro.

Observations from Earth’s surface and data from spacecraft and satellites indicate that much of the energy emitted during nightglow comes from recombination processes. In one such process, radiant energy is released when oxygen atoms recombine to form molecular oxygen, O2, which had originally become dissociated upon absorbing sunlight. In another process, free electrons and ions (notably ionized atomic oxygen) recombine and emit light.

In the daytime and during twilight, the process of  resonance scattering of sunlight by sodium, atomic oxygen, nitrogen, and nitric oxide seems to contribute to airglow. Moreover, interactions between cosmic rays from deep space and neutral atoms and molecules of the upper atmosphere may play a role in both the nocturnal and daytime phenomena in the high latitudes.


So sometimes when out taking photos, it looks like you might have an aurora, despite no space weather indicating an auroral event. When that is the case, it is most probable you have captured airglow instead.

Credit : https://www.britannica.com/science/airglow

Additional credit : https://en.wikipedia.org/wiki/Solar_cycle

Click here to go back to the main blog page for other articles

Posted in Uncategorized

Aurora Australis 2

Wednesday, May 15th, 2024
I have adapted this post, largely crediting the explanation provided online by Dr Stephen Voss, from Central Otago in ‘Aurora- The Jargon Explained’. Some links have lapsed since first published, and I have tried to re-establish as best I can what what I know.

How is Auroral Activity Monitored in Real Time, and How Can we Predict When an Aurora Might Appear?

OK, so there are a heap of scientists who monitor this. Subsequently a lot of space science is directed at this, given the effect space weather has on space exploration, satelittes, communications, GPS etc. Much of this is publicly available, via various online graphs and charts. Let’s start at the sun and work our way out from there. We are lucky to have several spacecraft dedicated to watching and recording activities on the solar surface, in the solar atmosphere, and surrounding space.


Aurora graphic

1) Observing Solar Flares: Solar Dynamic Observatory (SDO)

NASA’s Solar Dynamic Observatory provides near real-time views of the sun at different wavelengths. For the most part these images will all look pretty similar from one hour to the next, but the appearance of a bright solar flare will quickly become visible on these images. Here’s an example of a bright flare close to the left edge of the sun
Solar Flare

2) Measuring Solar Flare Intensity: GOES (Geostationary Operational Environmental Satellite) X-ray Detector

It is also possible to view a graph of x-ray radiation intensity at the suns surface recorded by (currently) the GOES 15 satellite. This provides a time-line of solar flare activity, updated in real time. Solar flares can be classified by intensity. C-Class flares are weak, M-Class flares are moderate, and X-class flares are of extreme intensity. Here’s an example of two X-class flares over a period of just three days back in July 2000:
Solar fares graph

3) Observing a CME: SOHO (The Solar and Heliospheric Observatory) Coronagraph

The SOHO spacecraft provides views of the sun in several wavelengths, but more importantly for us, it has an instrument onboard called a coronagraph which allows a detailed view of the suns outer corona. This allows us to see the passage of a Coronal Mass Ejection (CME) into space. Here’s an example of a CME being expelled from the eastern limb of the sun (left
side of the image) . The black disc in the centre of the image is a cover which blocks out the intense light from the sun’s surface allowing the detail of the outer corona and solar wind to be observed. The “movie theatre” link on the SOHO page is especially good for creating animations of the ejected CMEs.
Sunspot graph

4) Monitoring the Solar Wind – The Advanced Composition Explorer Spacecraft (“ACE”)

This spacecraft sits between the Earth and the Sun at a distance of 1.5 million km and monitors the solar wind. Once again, the data is available as a near live feed. A number of solar wind parameters can be measured, but the important ones for us are wind speed, wind density, and intensity / direction of the imbedded magnetic field (yes, the solar wind has it’s own magnetic field). Here’s an example from 2012 which shows the impact of a CME with the ACE spacecraft. The yellow line is wind speed, the orange line is density, and the double line (white and red at the top) is the magnetic field density and direction. You can clearly see the results of the CME impact just after 1100 hours UTC. There is a sudden jump in all of these three parameters.
Of all these parameters, probably the most important is the red line at the top, the so-called Bz (pronounced “Bee-zed”). It is a measure of just the south pointing component of the magnetic field within the solar wind. The more south the magnetic field, the more negative the red line goes. The more negative the Bz, the better – a south pointing magnetic field interacts with and minimises the protective effect of Earth’s own magnetic field. With the Earth’s protective barrier weakened, more particles can penetrate into the upper atmosphere, and the chances of aurora increase significantly. A strongly positive Bz (north pointing magnetic field) will shut down the aurora in a blink. The white line (Bt) is a measure of the total magnetic field intensity irrespective of direction. Bz can never be greater than Bt.
ACE graph

5) Observing the effect at Earth – Magnetometers

Finally we have the effect of the impacting solar wind on Earth’s magnetic field. When the disturbance finally arrives there can be quite a shake-up of the Earth’s own magnetic field, and this geomagnetic disturbance can be measured on a device called a magnetometer. Magnetometers measure variations in the intensity and direction of the local magnetic field, a sort of “seismograph” for geomagnetic disturbances.

Piecing It Altogether – Predictive Tools

So, we have the ability to observe when a solar flare occurs, and to determine if a coronal mass ejection has been hurled in our general direction as a result. We also have the ability to observe the passage of this disturbance as it gets closer to Earth and we can see the effects that this has on Earth’s own magnetic field. How can we piece this all together to provide an accurate prediction? We have several useful online tools to help us:

1) The Kp Index **

Ultimately what all of this solar wind stuff does is to rattle up the Earth’s magnetic field. The more rattled, the more chance of aurora appearing. The Kp index is a measure of the severity of global magnetic disturbances near Earth. The Kp scale ranges from 0 to 9, with 9 obviously the most intense disturbance. For those of us in high-middle latitudes such as southern New Zealand or Tasmania, a Kp level of 5 will frequently be associated with visible aurora. The US Air Force use a predictive algorithm to make an educated guess as to what the Kp index will be in the future based on (amongst other things) the various solar wind parameters discussed above.

2) NOAA Ovation Aurora Forecast Model

This map attempts to take all the raw data available and then plots the probability and predicted location of the aurora from that data. The map is reasonably self explanatory. As the red “view line” gets closer to your location, the greater the chance of you seeing something. It’s worth noting however a number of brief auroral outbursts have been viewed when the view line was still plotted further south.
Auroral Oval

3) GOES-16 (Geostationary Satellite) Magnetometer Tracings and Prediction of Substorms (The “Cloake Effect”)

Long time aurora observer and Timaru based photographer Geoff Cloake was first to note an apparent pattern of auroral rays briefly appearing in association with sudden upswings in the GOES magnetometer tracing (the blue line in the tracing below). This effect has subsequently been observed on numerous occasions, and has proven extremely useful in helping some diehard observers to position themselves in a dark location just as a brief auroral substorm makes an appearance.

Credit : 

Dr Stephen Voss, ‘Aurora- The Jargon Explained’, March 2015 v3

 **Why the kP index is mostly (but not entirely!) irrelevant in NZ & Australia

Source – Southern Hemisphere Aurora Group – David Hunter

Background Physics

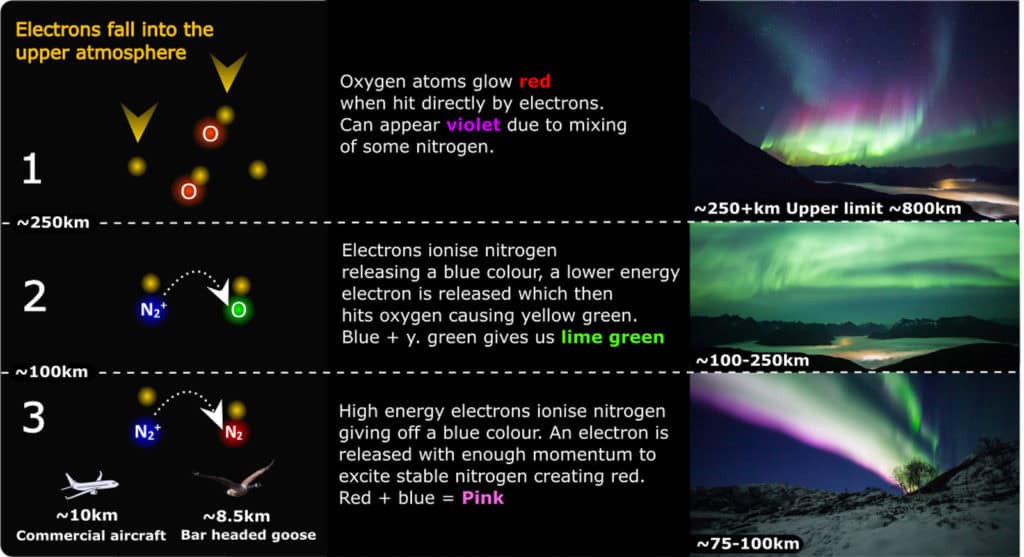
The incoming solar wind collides with atoms in the Earth’s ionosphere (in the upper atmosphere), ionizing them (hence the name “ionosphere”). Ions are atoms that have lost or gained an electron, and so have an electrical charge. Thanks to Michael Faraday’s Law of Electromagnetic Induction, we know that wherever an electric field exists, a magnetic field also exists. In the ionosphere, the ionisation caused by the solar wind disturbs the Earth’s natural magnetic field, making it stronger closer to the poles.
We measure this magnetic disturbance with ground- and space-based magnetometers. 

What is the kP index?

The “k-index” is a measure of the level of disturbance of the Earth’s magnetic field. These are measured by ground-based magnetometer stations.
These are often referred to as kH, kL, and kC… these are the k-indices for Hobart (kH), Launceston (kL), and Canberra (kC). In the United States, America, and Europe (and in almost every aurora app I’ve seen), they refer to kP instead. kP is simply an average value of the k-indices of eight different magnetometer stations: four based in North America, three in Europe, and one in Australia (Canberra). The P in kP stands for “Planetary”.
 

What’s wrong with kP?

There are two issues with the kP index as far as NZ / Australia is concerned:
  1. kP is calculated from eight magnetometers. Seven of those eight magnetometers are in the Northern Hemisphere. Just one is in the Southern Hemisphere, in Australia. This selection bias can cause the kP value to be vastly different from a local southern hemisphere k-indices (kH, kL, kC, etc.).
  2. During our Summer, the Earth is tilted such that the Northern Hemisphere (during our day time) is tilted away from the Sun – so the northern magnetometers are actually tilted toward the equator and so end up being more so in the “firing line” for the solar wind colliding with the Earth following magnetic reconnection. (i.e. the night side of the Earth always gets more solar wind than the day side, and because the northern magnetometers are tilted into the night side of the planet more, the effect of the aurora is stronger on these magnetometers during our Summer). Meanwhile, our own magnetometer in Canberra is tilted up into the Sun more, and so the solar wind misses that magnetometer – the auroral effects are reduced on the Canberra magnetometer at day time during the Summer. So you end up with enhancement of northern magnetometers (7 of the 8 magnetometers used to calculate kP) and a reduction in the Canberra magnetometer, making the kP index even more biased. Consider then what happens in winter, the opposite occurs and the Canberra magnetometer becomes more relevant, but it is still only one of eight magnetometers, so there is still that bias at play.
 

kP Index Forecasts

Note that the kP index (and the local k-indices) is a measure of past magnetic field activity – it is not a measure of what will happen in future. Therefore, the kP index (and local k-indices) are useless for forecasting auroras.
That said, it is possible to forecast the k-indices and kP index.
The kP forecast (officially called the USAF Wing-kP Model) is based on ACE/DSCOVR spacecraft magnetometer data and not the eight ground-based magnetometers used for calculating the kP index itself. Therefore, the kP index forecast is useful for predicting general trends in the local k-indices (e.g. if the kP forecast is for increased magnetic disturbance, a local k-index value should experience an increase in magnetic field disturbance if the forecast was correct). However, the exact values of the kP index forecast cannot be substituted for local k-index values due to the hemispheric and tilt biases I explained earlier.
 
What the kP index is good for
1. kP is good for America and Europe, because there is a greater landmass in the northern hemisphere, and a greater number of magnetometers in that hemisphere (so the kP average is biased towards northern hemisphere values).
2. The USAF Wing kP Model (kP forecast) is also useful for forecasting magnetic field disturbance in space where satellites operate. The United States operates numerous defence, communication, and science-related satellites. All of which can be effected by space weather, hence the USAF’s involvement in space weather forecasting.
3. As explained above, the kP forecast can be used to forecast general trends in local k-indices. However, keep in mind that a k-index is a measure of PAST magnetic field activity: it cannot and should not be used to try to predict auroral visibility in specific locations at specific times.

Summary

Simply put, the k-index is the measure of the disturbance of the Earth’s magnetic field at a particular location on Earth, as caused by solar activity and subsequently, aurora.
For southern regions, a localised k index is a better indication, than the broader kP index, which is essentially a global average . Regardless of source, any k monitoring records the activity that has just happened as solar wind hits earth.
Noting, that the bulk of the magnometers that produce the kP  index are located in northern hemisphere. Subsequently, the activity they pick up may not equate fully to auroral activity in the south. This is due in part to natural variations of earth tilt (our seasons), as well as directional differences of electrons sweeping past earth. Not all ‘hits’ of solar wind from the sun reach earth equally or directly.
So by choice, the kP index is a adequate, but broad indication of current auroral activity.
Much better for us wanting to see Aurora in the south, is the use a ‘localised’ k source, such as Hobart.
Yet does not always equate to future aurora activity.
If activity using the k / kP index shows a heightened reading, there are additional graphs, observations and data that can be used to provide greater analysis, that we can use to anticipate any incoming space weather. Subsequently, any upcoming auroral possibility still to eventuate.
These additional graphs, data, observations and readings are much better indicators of the likelihood of seeing (or photographing) auroral activity, as this data comes further out from various satellite & solar monitoring sources. So can give us some forewarning ranging from minutes to days. I’ll explain some of these in the next posts.
Sun Earth auroral graphic
 

Posted in Uncategorized

Aurora Australis 1

Wednesday, May 15th, 2024

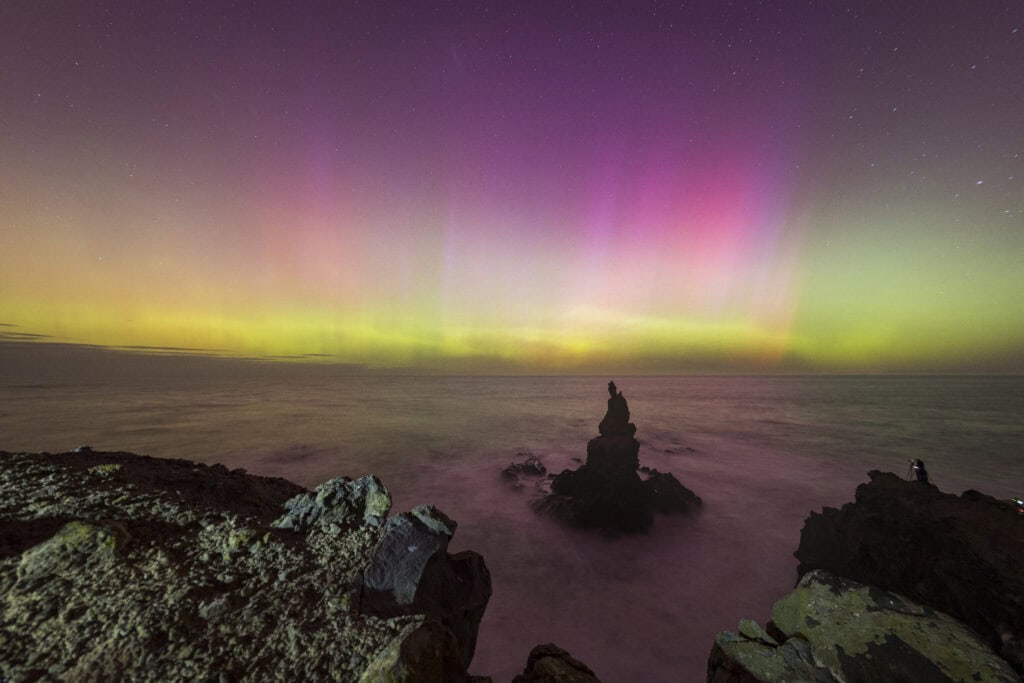
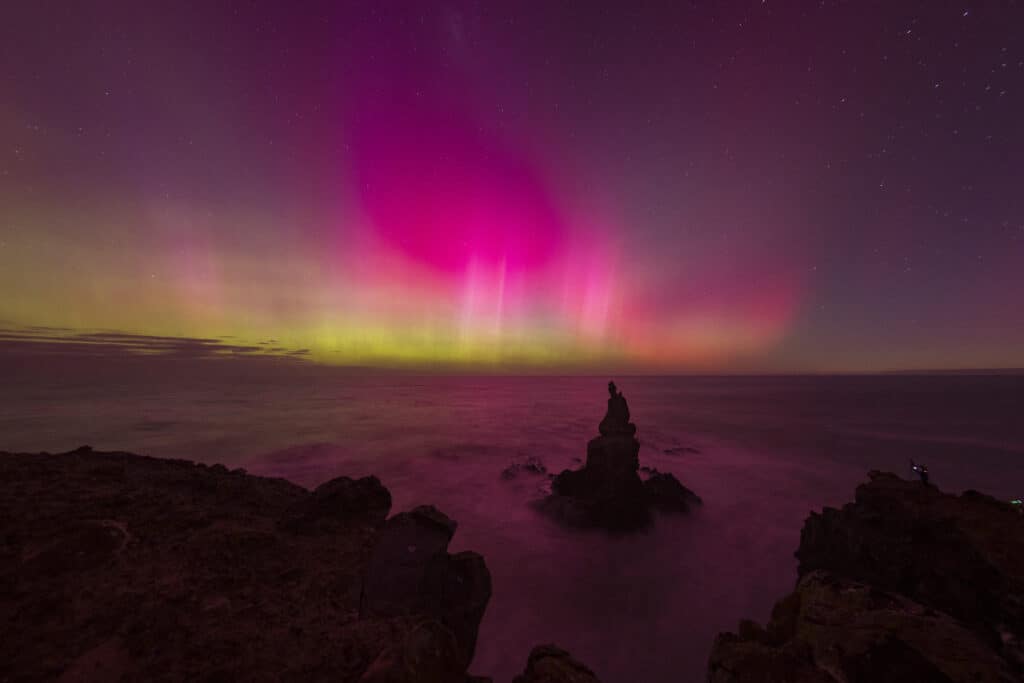
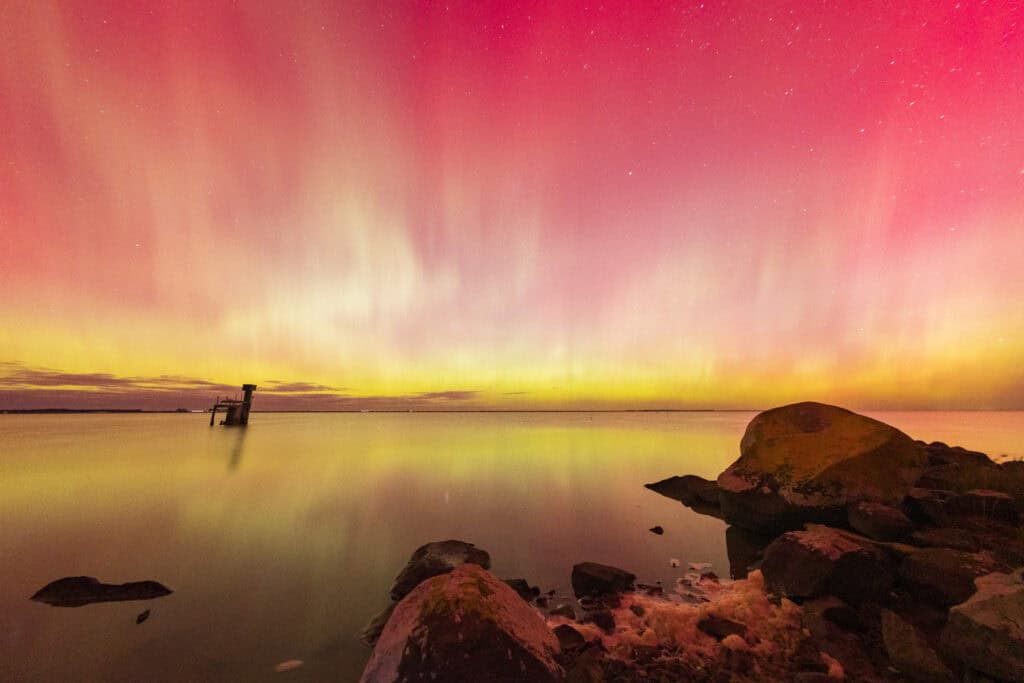
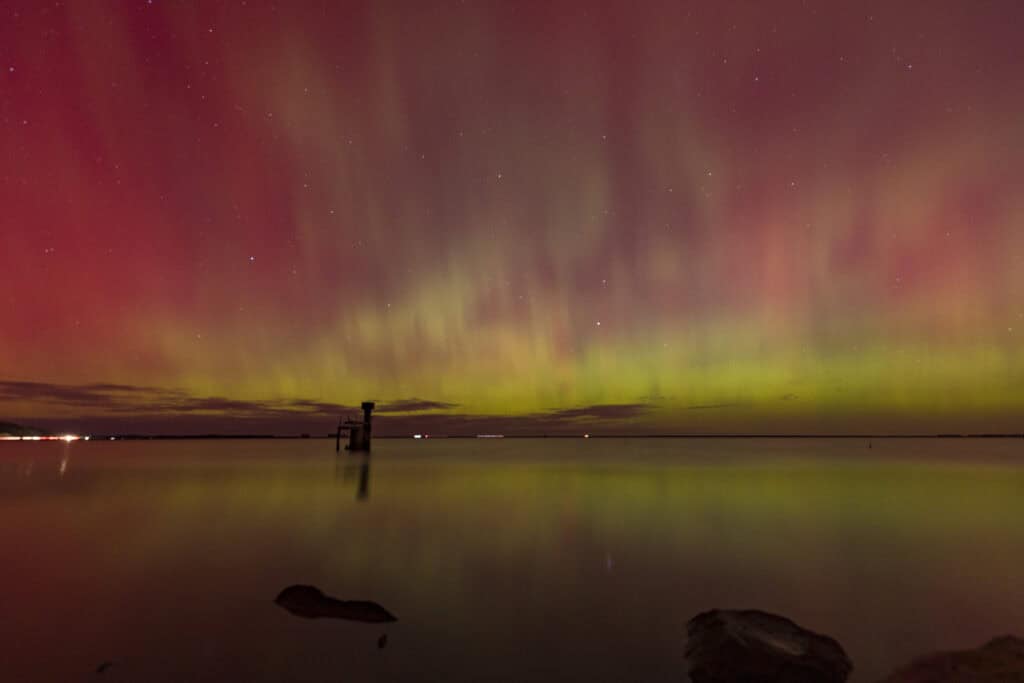
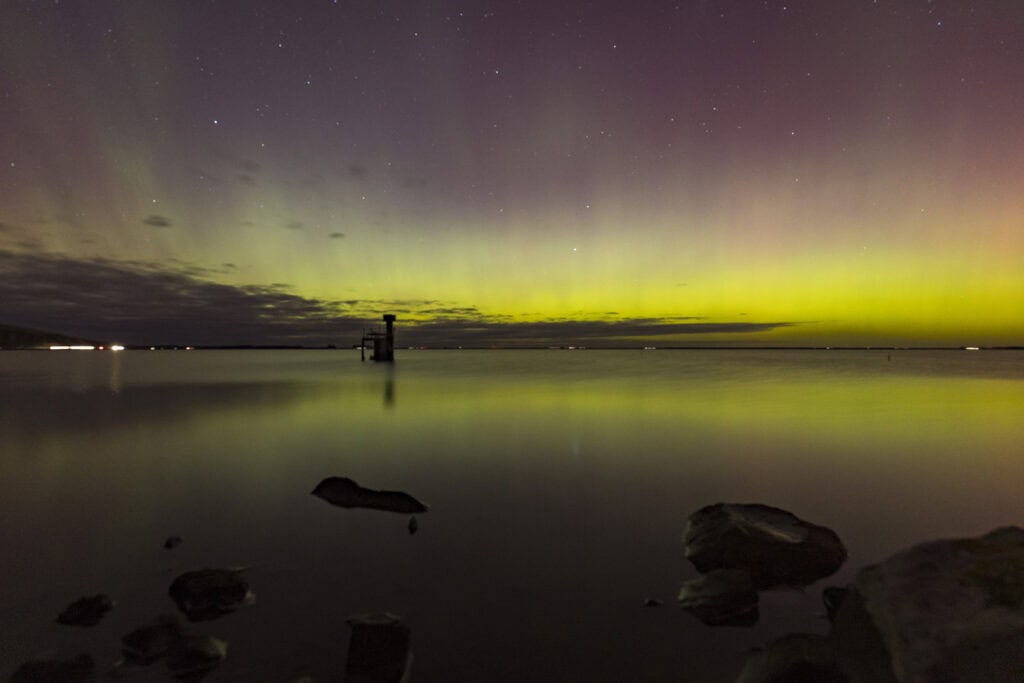
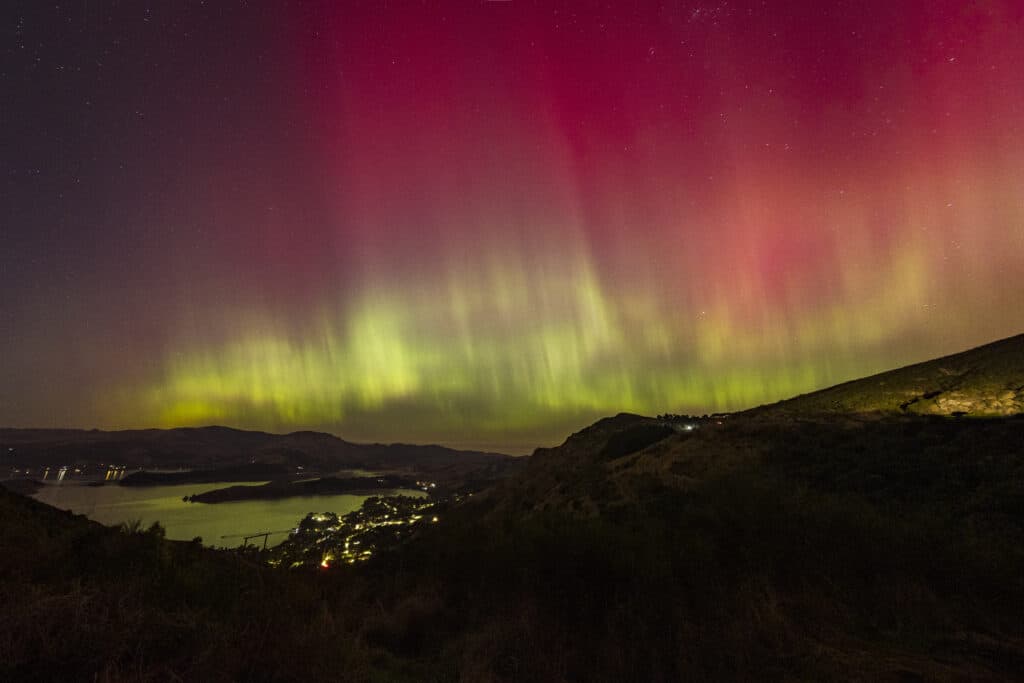
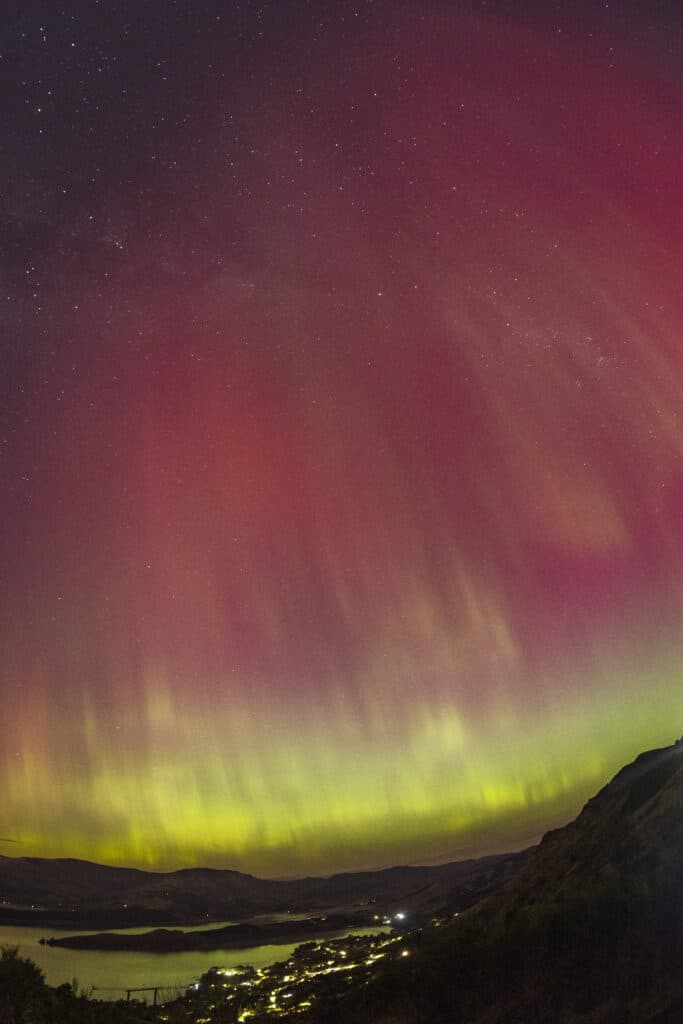
Last weekend (Sat May 11th 2024) was a huge weekend for aurora hunters like myself.

In a series of posts, I’ll do my best to explain some of this phenomenon, what causes the Aurora Australis (and Borealis), and how to photograph them.

So, What Causes the Aurora?

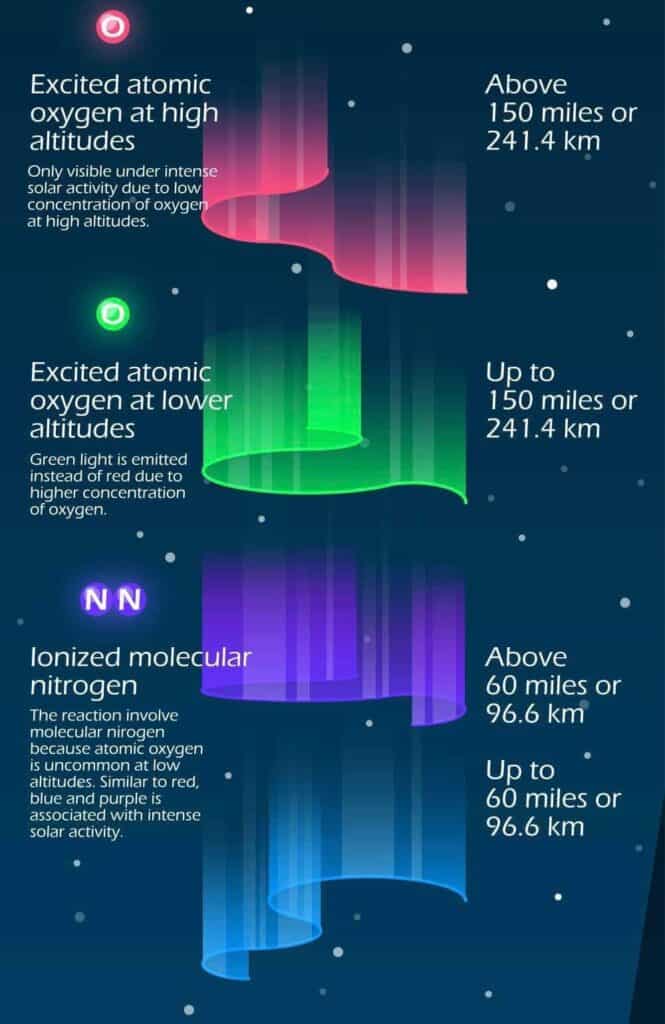
In a single sentence, the aurora is created when highly charged particles that have been ejected from the sun interact with oxygen and nitrogen atoms in Earth’s upper atmosphere. This so called “solar wind” is ever present, and the Earth is continuously passing through a constant stream of these particles. For the most part, the Earth’s magnetic field deflects these particles, with only a small number penetrating this protective barrier, typically in the regions close to the north and south magnetic poles. On occasions, the barrage from the solar wind can increase dramatically, distorting the Earth’s magnetic field, allowing a larger number of particles to reach the upper atmosphere, and triggering bright and dynamic displays of the Northern and Southern Lights.
What causes aurora australis grapic

What causes aurora graphic


So What Causes an Increase in Solar Wind?

Two principle events are associated with a surge in the solar wind.
The first is the Coronal Mass Ejection (“CME”) – a sudden burst of plasma from the sun’s corona (outer atmosphere), usually originating from a magnetically complex area on the sun’s surface. CME’s are often associated with Solar Flares, bright flashes of electromagnetic radiation (in essence, flashes of light). People sometimes confuse Solar Flares with CME’s. The flare is the burst of radiation, the CME is the expulsion of actual matter. Not every flare will produce a CME, and not every CME will be associated with a flare, but it’s reasonable to say that the brighter flares will usually have a CME associated with them.

1) Coronal Mass Ejections (CME)

Coronal Mass Ejections (CMEs) are large expulsions of plasma and magnetic field from the Sun’s corona. They can eject billions of tons of coronal material and carry an embedded magnetic field (frozen in flux) that is stronger than the background solar wind interplanetary magnetic field (IMF) strength. CMEs travel outward from the Sun at speeds ranging from slower than 250 https://www.swpc.noaa.gov/phenomena/coronal-mass-ejections per second (km/s) to as fast as near 3000 km/s. The fastest Earth-directed CMEs can reach our planet in as little as 15-18 hours. Slower CMEs can take several days to arrive. They expand in size as they propagate away from the Sun and larger CMEs can reach a size comprising nearly a quarter of the space between Earth and the Sun by the time it reaches our planet.

The more explosive CMEs generally begin when highly twisted magnetic field structures (flux ropes) contained in the Sun’s lower corona become too stressed and realign into a less tense configuration – a process called magnetic reconnection. This can result in the sudden release of electromagnetic energy in the form of a solar flare; which typically accompanies the explosive acceleration of plasma away from the Sun – the CME. These types of CMEs usually take place from areas of the Sun with localized fields of strong and stressed magnetic flux; such as active regions associated with sunspot groups. CMEs can also occur from locations where relatively cool and denser plasma is trapped and suspended by magnetic flux extending up to the inner corona – filaments and prominences. When these flux ropes reconfigure, the denser filament or prominence can collapse back to the solar surface and be quietly reabsorbed, or a CME may result. CMEs travelling faster than the background solar wind speed can generate a shock wave. These shock waves can accelerate charged particles ahead of them – causing increased radiation storm potential or intensity.

Important CME parameters used in analysis are size, speed, and direction. These properties are inferred from orbital satellites’ coronagraph imagery by SWPC forecasters to determine any Earth-impact likelihood. The NASA Solar and Heliospheric Observatory (SOHO) carries a coronagraph – known as the Large Angle and Spectrometric Coronagraph (LASCO). This instrument has two ranges for optical imaging of the Sun’s corona: C2 (covers distance range of 1.5 to 6 solar radii) and C3 (range of 3 to 32 solar radii). The LASCO instrument is currently the primary means used by forecasters to analyze and categorize CMEs; however another coronagraph is on the NASA STEREO-A spacecraft as an additional source.

Imminent CME arrival is first observed by the Deep Space Climate Observatory (DSCOVR) satellite, located at the L1 orbital area. Sudden increases in density, total interplanetary magnetic field (IMF) strength, and solar wind speed at the DSCOVR spacecraft indicate arrival of the CME-associated interplanetary shock ahead of the magnetic cloud. This can often provide 15 to 60 minutes advanced warning of shock arrival at Earth – and any possible sudden impulse or sudden storm commencement; as registered by Earth-based magnetometers.

Important aspects of an arriving CME and its likelihood for causing more intense geomagnetic storming include the strength and direction of the IMF beginning with shock arrival, followed by arrival and passage of the plasma cloud and frozen-in-flux magnetic field. More intense levels of geomagnetic storming are favored when the CME enhanced IMF becomes more pronounced and prolonged in a south-directed orientation. Some CMEs show predominantly one direction of the magnetic field during its passage, while most exhibit changing field directions as the CME passes over Earth. Generally, CMEs that impact Earth’s magnetosphere will at some point have an IMF orientation that favors generation of geomagnetic storming. Geomagnetic storms are classified using a five-level NOAA Space Weather Scale. SWPC forecasters discuss analysis and geomagnetic storm potential of CMEs in the forecast discussion and predict levels of geomagnetic storming in the 3-day forecast.

CMEs often look like huge, twisted rope, which scientists call “flux rope.” CMEs often occur along with solar flares (explosions on the Sun’s surface), but they can also occur spontaneously. The frequency of CMEs varies with the 11 year solar cycle.  Both are born when the sun’s magnetic fields explosively realign, driving energy into space. A CME is an immense cloud of magnetized particles hurled into space in a particular direction, sometimes toward Earth.  But a solar flare is a brilliant flash of light.

Solar Flares (Radio Blackouts)

Solar flares are large eruptions of electromagnetic radiation from the Sun lasting from minutes to hours. The sudden outburst of electromagnetic energy travels at the speed of light, therefore any effect upon the sunlit side of Earth’s exposed outer atmosphere occurs at the same time the event is observed. The increased level of X-ray and extreme ultraviolet (EUV) radiation results in ionization in the lower layers of the ionosphere on the sunlit side of Earth. Under normal conditions, high frequency (HF) radio waves are able to support communication over long distances by refraction via the upper layers of the ionosphere. When a strong enough solar flare occurs, ionization is produced in the lower, more dense layers of the ionosphere (the D-layer), and radio waves that interact with electrons in layers lose energy due to the more frequent collisions that occur in the higher density environment of the D-layer. This can cause HF radio signals to become degraded or completely absorbed. This results in a radio blackout – the absence of HF communication, primarily impacting the 3 to 30 MHz band. The D-RAP (D-Region Absorption Prediction) product correlates flare intensity to D-layer absorption strength and spread.

Solar flares usually take place in active regions, which are areas on the Sun marked by the presence of strong magnetic fields; typically associated with sunspot groups. As these magnetic fields evolve, they can reach a point of instability and release energy in a variety of forms. These include electromagnetic radiation, which are observed as solar flares.

Solar flare intensities cover a large range and are classified in terms of peak emission in the 0.1 – 0.8 nm spectral band (soft x-rays) of the NOAA/GOES XRS. The X-ray flux levels start with the “A” level (nominally starting at 10-8W/m2). The next level, ten times higher, is the “B” level (≥ 10-7 W/m2); followed by “C” flares (10-6 W/m2), “M” flares (10-5 W/m2), and finally “X” flares (10-4 W/m2).

Radio blackouts are classified using a five-level NOAA Space Weather Scale, directly related to the flare’s max peak in soft X-rays reached or expected. SWPC currently forecasts the probability of C, M, and X-class flares and relates it to the probability of an R1-R2, and R3 or greater events as part of our 3-day forecast and forecast discussion products. SWPC also issues an alert when an M5 (R2) flare occurs.

The table below provides the correlation between radio blackouts, solar flares, nominal energy flux (watts per square meter), and the designated severity event descriptor


Radio Blackout….. X-ray Flare….. Flux (W/m2)….. Severity Descriptor

R1                            M1                   0.00001               Minor

R2                            M5                   0.00005               Moderate

R3                            X1                     0.0001                 Strong

R4                            X10                   0.001                   Severe

R5                            X20                   0.002                   Extreme

Solar Flare Image

2) Coronal Hole

The other cause for a surge in the solar wind is the so-called “Coronal Hole”. These are areas of low density with open magnetic fields in the suns outer atmosphere that allow the solar wind to escape more rapidly. However the increase in solar wind speed is frequently off-set by a decrease in solar wind density, so the disturbance produced by these events is usually less dramatic than that from a large CME. These events occur around an 11 year solar cycle. At the peak of this cycle, sunspot activity increases, as does the frequency and intensity of solar outbursts. At the through of the cycle the occurrence solar activity fades to a minimum. In 2024-25 we are reaching the peak of the most recent cycle (#25).

Posted in Uncategorized

How to Hire the Right Event Photographer

Friday, May 3rd, 2024

Do you want to ensure your event photos are memorable? Here is what you need to know when hiring the right event photographer.

When it comes to capturing the magic of your event, there is a huge difference between hiring any photographer, and hiring a great photographer. Whether it’s a ball, conference, prizegiving or formal dinner, a skilled photographer can make all the difference in capturing your people, and providing imagery to the story you want to tell. But with so many options out there, how do you choose the right one?

Ask for referrals

Check their portfolio

Ideally Meet With Them

Pre-determine any key shots and make a list

Check what they can bring

Check their equipment and back up plan

Organise your introductions & runsheet


1) Ask for Referrals

Ask friends, family, or colleagues who have recently hosted an event for recommendations. They can provide valuable insights into a photographer’s work ethic, communication style, and overall quality of service.

2) Check Their Portfolio

Look at the photographer’s portfolio to get a sense of their style and expertise. Check for consistency in their work and pay attention to the quality of the images. Do they have experience shooting events similar to yours? Can they work with low light?
Do people look comfortable, like they are having fun? Do photos capture the essence of the event?
Is there attention to detail – do people have crooked ties? straps showing? stay hair? awkward hands? holding empty glasses? You get the picture.
Guests riding on a Hagglund at the International Antarctic Centre, Christchurch, New Zealand.
Event photography with group posed next to therometer at the International Antarctic Centre, Christchurch, New Zealand.
Group poses in chiller, at the International Antarctic Centre, Christchurch, New Zealand.

3) Ideally Meet with Them

Finally, meet with the photographer where this is possible to discuss your needs and expectations. Pay attention to their communication style, attention to detail, and overall professionalism.
 

4) Define Your Needs

Firstly, consider the type of event and the style of photography you’re looking for. Do you want candid, natural shots? Or more formal, posed photos? Do you want a photographer who specializes in a particular style, such as black and white photos? Or candid documentary style?
Or are you wanting a static base, using the a backdrop, lit with studio lighting? Don’t worry if a venue may appear dark or space not overly salubrious. This can be transformed and adapted by your photographer.
You will need to provide a sufficient ‘footprint’ to ensure enough space background and lights. This can often be overlooked, and is a really important consideration if expecting large groups (as well as power access). If the photographer is forced to be too close, they will need to use a wide angle lens. Which sadly will distort people. Generally speaking, you’ll need to co-ordinate the best space to account for any change in weather or temperature. Especially if your preference may be outdoors, or have an early start for a longer session.
Rationalise how long you might require photos, especially if people are drinking! People will be looking their best on arrival, and the most relaxed mid evening. Left too late, and the wild party you might be showcasing, is at risk of not being ‘on brand’ if you know what I mean?! Yet happy fun people could well be, so just make sure its a deliberate decision.
Hillary Barry with award recipients at Selwyn District Council Awards, Rolleston.
Award recipient and sponsor Selwyn District Council Awards, Rolleston.
Conference attendees enjoying a mix and mingle at morning tea.

5) Pre-determine Any Key Shots and Make a List

If you provide a list of  ‘must haves’, this will go a long way to ensure you aren’t disappointed afterwards should there be special moments not recorded. Especially if you have VIP’s, dignitaries, or special invited guests. Not least of all sponsors!!
Do point key people out so the photographer knows who they are, and were they may be seated.

6) Check What They Can Bring

An established event photographer will have all the right lighting kit, backgrounds, and most likely, props. The later can be a lot of fun if you are after playful and ‘silly’. Wigs, glasses, sports kit, soft toys, boas, hats ….the options are endless!
They should also have a necessary leads, weights, clips, lead covers as needed for ensuring a safe area, free of trip and bump hazards.

7) Check Their Equipment and Backup Plan

Make sure the photographer has professional-grade equipment, and a backup in the event of equipment failure.
Do they have a spare camera body? Spare batteries for cameras and flash? Are light stands to be weighted? Is electrical equipment certified?
What happens if they cant make it? If there is or bad weather?

8) Organise Your Introductions & Runsheet

Make sure you provide introductions on the night (or day)! If there is a dedicated event co-ordinator, MC or presenter, it will always pay to have everyone co-ordinated. Kiwi’s are notorious at avoided self praise and attention, especially at award type events. Most people will try and minimise any attention in the limelight. Walking up on stage in front of a large crowd, is up their with public speaking for many. But if not managed, the ‘grip n grin’ presentation you need recorded, could well be at the wrong spot, or appear rushed. Or worse, end up as an awkward handshake or without alternatives t0 a single shot plagued by a blink.
Sharing a well developed runsheet with your photographer is critical. Not only do they know what is happening, but they can think ahead to be in place as needed. This will save un-necessary movement, and subsequently minimise distractions for guests and presenters alike. Also establishing the best spot ahead of time is always an advantage. It can also mean your photographer knows when they might be able to grab a moment for a ‘comfort stop’ and the likes, and not miss crucial content.
Award recipient on stage, Selwyn District Council Awards, Rolleston.

Posted in Uncategorized

Newest Art Piece

Wednesday, March 27th, 2024

Recently I have been away in the North Island, with the ability to take some time for photos about the Central Plateau. This is one piece I have created title ‘Kaimanawa Stump’.

Being from Canterbury, I don’t often explore deep around the North Island. In fact, it has been a few years since I lived and worked there. I’d actually forgotten about some of the hidden wonders that abound. I LOVE the South Island, and in true Cantabrian fashion do tend to be a bit one eyed about the scenic wonder that we are blessed to live amongst here. Yet there is beauty and awe everywhere, sometimes you just have to look.


Kaimanawa Stump in black in white with river movement.


Thanks to good buddy Glen Howey, I have a little behind the scenes video,  to share the location for the epic black and white stump you see here.

We drove a short way off the Desert Road, and stopped by a fairly non descript bridge set amongst native bush. Yet Glen had been here before, and knew a semi hidden track that lead down a steep path to the river canyon you see here.

It was rugged, quite steep, with only a faint track. Yet holding onto branches and logs, we clambered down onto the rocky edge of the canyon.

At first I wasn’t too sure there was much on offer, but managed to explore away. While the overall canyon was wild and imposing, there didn’t seem to be ‘a lot’. Like many things creative, you need to play around and work your eye in. I’m now super stoked with the final image. Photographed with a neutral density filter, and long exposure, the aim was always to try and introduce some movement of the water. I feel this adds a sense of softness to the obvious power of water that caused the destruction of the fallen tree. You know at some stage, this spot would not have been a nice place to be. Even on a fine day like this, you couldn’t help be mindful of what was about you, knowing the crashing water led to a very deep gorge close by. The sort of place that if wet, you knew you would be in serious danger. Not only dangerous underfoot, but also with limited options to get away from rising and almost certainly raging water. If swept into the canyon chute just after the log seen, you know it would be simply terrifying . Yet despite this, the serenity of cotton candy trails captured here have a certain beauty.


The final image is largely as seen in-camera. The RAW file was converted to black and white, with localised highlight control, and some fairly broad edge vignetting.

You can see a couple of mock ups of potential framing options below. There are many quite clever options now available for artists to vsualise their work. While rooms may be generic, it is helpful I think to see a visual of how a photo might look on display.

Neat huh?!

I hope you like seeing a little behind the scenes, and learning a little of the background behind where I have created one of my art images. I may start doing a few more visual descriptors, as I journey about the countryside looking for inspiring landscape photos.

Mock up of Kaimanawa stump fine art print


Kaimanawa stump fine art photo layout in lounge


Kaimanawa stump fine art photo layout imposed in room view


Further room mock up of the fine art photo, Kaimanawa stump photo, by Tony Stewart.


The link to purchase a print of this wild river scene is available here:

https://shop.photoshots.co.nz/print_shop/products/32968463/196165/all


All other fine art photographs available to purchase as prints, enlargements, frames, or canvasses can be viewed here:

https://shop.photoshots.co.nz/printshop

Posted in Uncategorized

Expert Low-Light Photography

Sunday, March 10th, 2024

To all my fellow event enthusiasts! I’m Tony – a proud Cantabrian and award winning professional photographer. I believe in the power of capturing moments that shimmer in the shadows. From elegant dinners to electrifying concerts, I’ve come to realize the importance of hiring an experienced professional photographer, especially when the lights dim and the ambiance takes center stage.

As our cultural diversity grows, and the scope of performance events increases, we have an amazing scene building here in Christchurch. We now experience a range of conferences, concerts and performances. Each unique, with a rich narrative able to be captured through the lens of a skilled photographer.  But low-light photography is a unique skill.

Firstly, technical prowess comes to the fore. Low-light situations throw a curveball at even the most seasoned photographers. Many lighting situations are highly contrasting, with bright lights and deep shadows. Lighting is often changeable, and requires careful consideration not to blow highlights, yet ensuring that shadow details dont become noisy. Mixed here is a understanding of balance of ISO (also known as senor sensitivity, that can add noise), with the need to preserve motion through the use of appropriate shutter control. The two are not always paired well, and will often require a fine balance.

But with experience comes expertise, and that’s precisely what I offer my clients. A professional who knows their gear inside out, who can adjust settings on the fly without missing a beat, ensuring every shot is as crisp and captivating as the moment itself.

Then there’s the artistry. Anyone can point and shoot, but it takes a trained eye to transform darkness into beauty. Whether it’s the soft glow of candlelight casting a romantic ambiance over a dinner or the dynamic interplay of stage lights at a concert, a skilled photographer knows how to capture the essence of the event, preserving its magic for eternity.

But perhaps most importantly, it’s about trust. When I hire a professional photographer, you are not just paying for a service. You are investing in peace of mind. Knowing that someone with years of experience and a passion for their craft is behind the lens allows you to relax. I can immerse myself in flow of the performance, so you can have confidence that your event can be immortalized with care and precision.

So, to all my fellow event planners and enthusiasts out there thinking of hosting an event in Christchurch, please take it from me. When the lights go down and the magic begins, don’t settle for anything less than the best. Invest in an experienced low-light photographer and watch as your events come to life in ways you never thought possible.

Elton John tribute act performer welcomes crowd on stage at Te Pae Christchurch.

Singer performs on stage at Te Pae as part of an Elton John tribute act.

Elton John tribute act performs on stage at Te Pae.


Like to know more? Contact me today

https://www.photoshots.co.nz/contact-tony-stewart/

Posted in Uncategorized

Conference Photography Explained

Wednesday, February 28th, 2024

Conference Photography in Christchurch, New Zealand

Christchurch, with its iconic landscape, is an ideal canvas for the conference events. Post quakes, the rebuild has ensured that the city centre is compact enough for people to walk about. Yet as a city, it also big enough to provide a variety of specialty venues and activities, especially now with Te Pae up and running. There are an increasing pool of hotel options now available. Given many businesses and event planners are also back into their work after the festive break, this could be a great time to explore how Photoshots can help with your conference or event.

From award nights, cocktail parties, business presentations, community workshops, or panel discussions, Tony and his team at Photoshots are experienced providing high quality image captures. Over the years, they have works at a whole range of venues, at manner of conventions, conferences and gala dinners. On the periphery of corporate and conference type events, they are also able to assist at reunions & jubilees, civic awards, concerts, hui, fundraisers, balls / formals and exhibitions.


Tony and his staff bring a wealth of experience that can enhance the value of your conference by:

  1. Storytelling through Imagery: By capturing key moments and emotions, Tony and his team can transform ordinary scenes and moments into a compelling narrative. The photos you receive have the power to convey the atmosphere, energy, and essence of your conference, creating a visual story that can resonates beyond the reach of the event itself. Photos will serve as cherished record for your organisation, and can act as powerful marketing tools, conveying the vibrancy driving your conference experience. Photos are great to share after your event in newsletters, an annual report,  delegate photos galleries and for promoting next year’s event!
  2. Professionalism and Expertise: With years of experience in the photographic industry, Tony brings a level of professionalism and expertise that will reassure conference organizers and delegates alike. His mastery of the craft ensures that photos are well composed, well-lit, and thoughtfully executed. Reflecting the high standards of photographic craft expected. Especially important, given that most event photography is often at the whim of low light and darkened rooms!
  3. Live Event Coverage: With scheduling and planning, Tony can provide real-time documentation of your conference. This not only serves as a valuable visual record for attendees at the time, but also creates a buzz on social media, extending the event’s reach to a broader audience.
  4. Showcasing the Venue and Locale: Tony’s talent extends beyond capturing people. He excels at showcasing the venue and the surrounding locale. Whether it’s the architectural elegance of the conference venue, or the scenic beauty of Canterbury, his photos can become a promotional asset for future events, enticing potential attendees and sponsors.
  5. Enhancing Brand Image: High-quality event photos contribute to the overall branding of your business or organisation. Tony and his staff are all well aware of the importance of enhancing your visual identity, to reflect positively on sponsors, organizers, and participants. Are people engaged, are they enjoying themselves, are logos prominent…? These images can be utilized in a range of future promotional materials, websites, and marketing collateral.
  6. Polite Engagement and Interaction: Tony and staff pride themselves on being able to engage with all people respectfully and politely. This can range from children and venue staff, through to CEO’s, VIP’s and Ministers.
  7. Understanding the Best Approach. Often the approach to photography varies within an event. Tony has 24yrs experience understanding large events, so gets that sometimes photography needs to be invisible and discreet.  ie keynote speakers, strategic planning sessions, AGM discussions, VIPs… Other times, photography needs to be directive and interactive, in order to work efficiently and keep on schedule. ie delegate group photo… Yet for other parts, a soft personable approach is necessary to engage with polite intrusion, ensuring breadth of coverage expected. ie conversazione, mix and mingle, dinner tables, sponsors…


In essence, a Photoshots contribution to your conference will exceed the mere provision of photos themselves. It will be a powerful visual record, that enriches your overall event. It will provide a rich archive for sponsors and future marketing, and a cherished record for participants and stakeholders. All while balancing discretion and polite engagement.

So, Photoshots would love to help your business, Association, Institute, or committee! You can see further conference work here:

https://www.photoshots.co.nz/conference/

You can email or call Tony here

https://www.photoshots.co.nz/contact-tony-stewart/

Exhibition hall set out with sponsors stands at pharmaceutical conference, Te Pae Christchurch.

Mixed group smiling at corporate networking event.

Posted in Uncategorized

New Fine Art Visualisations

Thursday, February 22nd, 2024

The newest page to the Photoshots website was a fine art gallery launched late last year. There are ~250 photos available to purchase as prints, framed enlargements or canvas wall art.

Here you can view many of my award images, and photos taken from assorted outdoor adventures and personal projects. Perfect to enjoy in print at home, at work, or as a gift for someone special.

Much of the work has been taken from various personal trips, that I have taken to explore the great outdoors. I will commonly head about Canterbury or Otago with the sole objective to take photos for pleasure.  I don’t always have a full plan as such, rather more a vague desire to try new technique, or visit somewhere new that I have only heard about. Often too, it is genuine exploration, driving down side roads just ‘to see’ what is there. It is seldom without reward, and I have been richly rewarded from such curiosity on many trips.

Subsequently I have many landscape images from all about the South Island, and to a lesser extent the North Island. I have tried to avoid too many ‘chocolate box’ photos, as I realise there are many other portals that will offer similar views. Instead, I have tried to offer a variety of locations, with visually interesting compositions, and unique interpretations. Though some locations are not always able to be truly unique – especially if you stick to signed areas and paths as required as good guardians of the countryside. Yet lighting and camera craft will always offer opportunity to add something unique to me.

I was taken very early in my career by the colourful series taken by Robin Morrison as he toured heartland New Zealand. I too have a fascination with simple design, with bold colour. Quite often these aesthetic elements are  juxtaposed amongst quite unexpected ‘finds’ out and about in heartland New Zealand.

House with newpaper curtains.


I have provided variations of colour and black and white, as well as a variety of size formats. These range from square (1:1 ratio), some 5:7, and panoramic 3:1 ratio. The most common by far though is native full frame 3:2 camera ratio.

Since launching, the gallery has recently had a refresh. Using some clever design software, many sample photos have been added, as well as a sizing guide. The room visuals offer a very clever interpretation of various frame options, sizing and generally how a photo may look in a domestic or office setting.

The aim is to assist prospective art buyers better understand the options online. I know that is challenging on computer, trying to guage what size or finish  is best.

Yet I will always be on hand to help, and offer advice as needed.


You can view all images here:

https://shop.photoshots.co.nz/printshop


Some examples of fine art photos available, displayed using mock ups in ‘real’ environments.

Framed print of the Aurora Australis displayed on a living room wall, taken by Christchurch photographer Tony Stewart.


Framed fina art canvas displayed on a living room wall, taken by Christchurch photographer Tony Stewart.


Moody black and white canvas displayed on a lounge wall, taken by Christchurch photographer Tony Stewart.


Panorama print of Fiordland displayed on a lounge room wall, taken by Christchurch photographer Tony Stewart.


Jesus face framed enlargement hung as a sample on a lounge wall, taken by Christchurch photographer Tony Stewart.


Framed and matted wall print taken by Christchurch photographer Tony Stewart, hung up in a living room.


Abstract textured photo taken by Christchurch photographer Tony Stewart, hung up in a living room.


Sample sizse available for wall art.


You can view all images here:

https://shop.photoshots.co.nz/printshop

Posted in Uncategorized